The idea to reuse empty filament spools as parts storage isn’t new. When I first started 3D printing I recall seeing that people had made curved containers that fit within a spool and thought that was a nifty idea. I’d always thought I’d make one for myself once I had a few empty spools laying around so here we are.
Back in the day I was using Tecor filament that was quite cheap and not bad for the money. The Lannix Design 3D printing cabinet is full of custom made ducting parts that I designed and 3D printed to suit what was needed for filtration and dehumidifying. Long story short, I ended up with many empty spools that were the same size and just begging to be turned into something useful.
Design
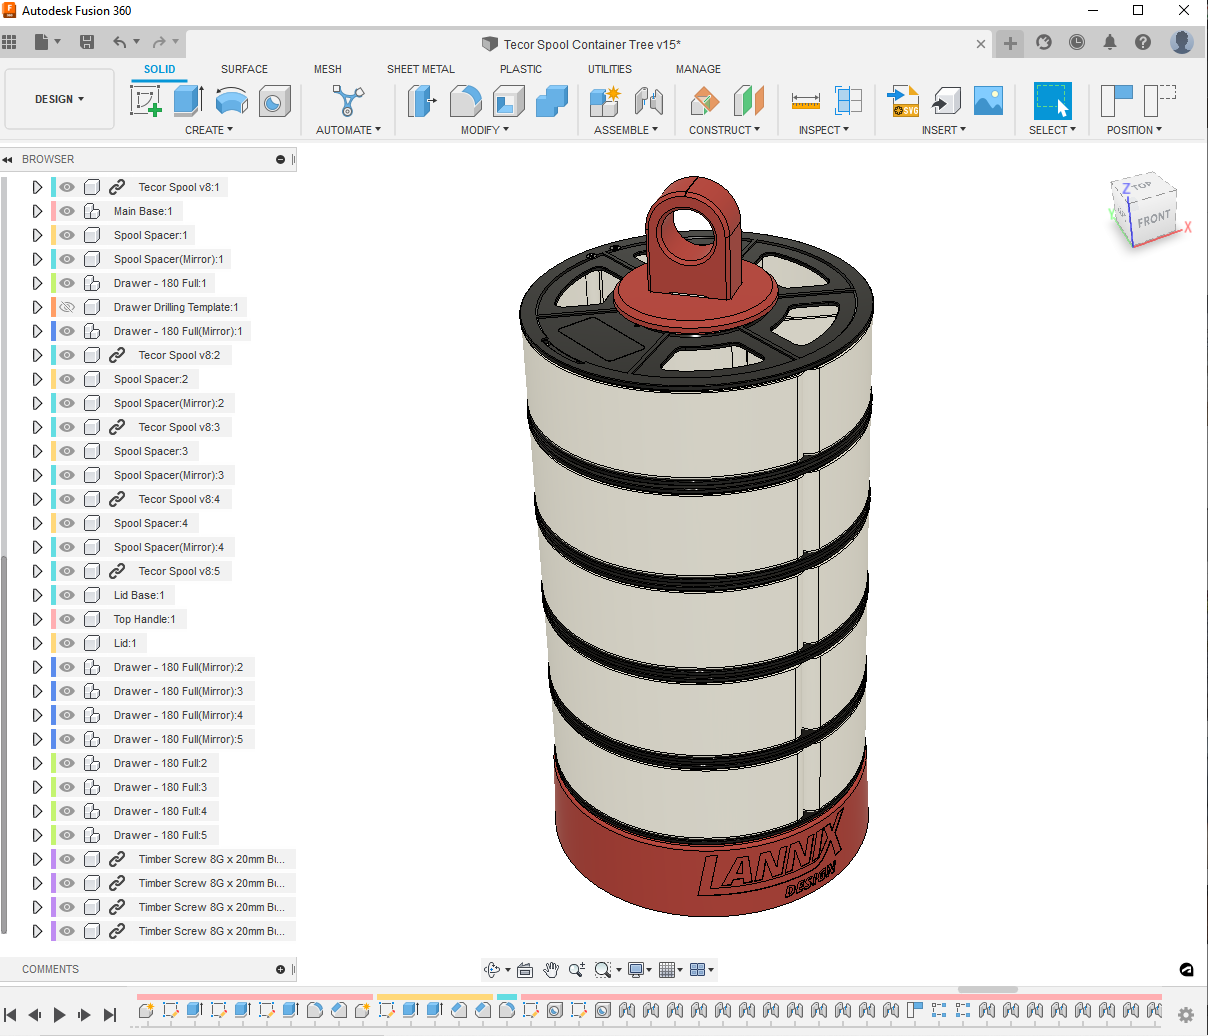
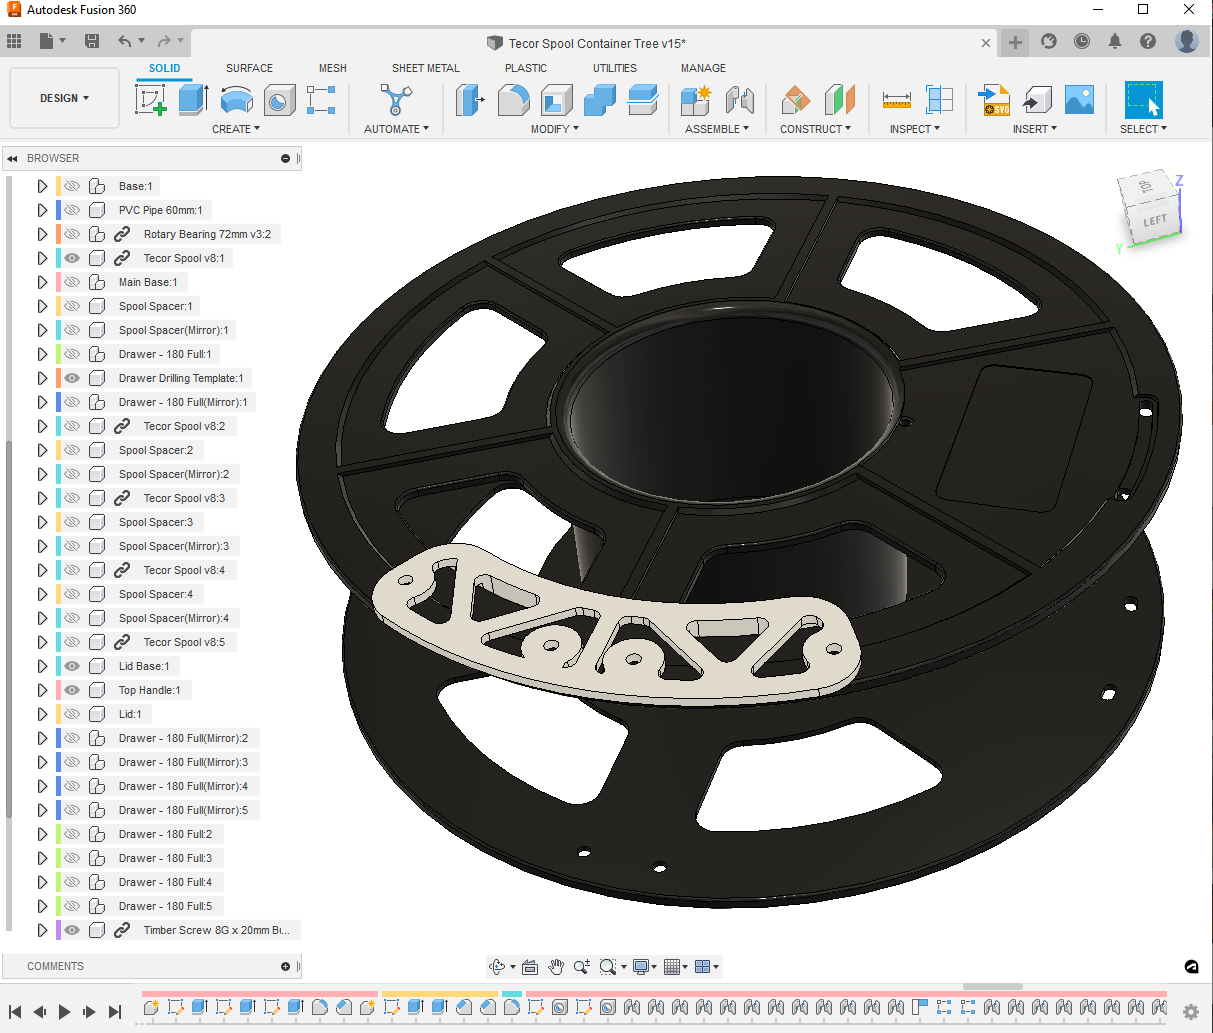
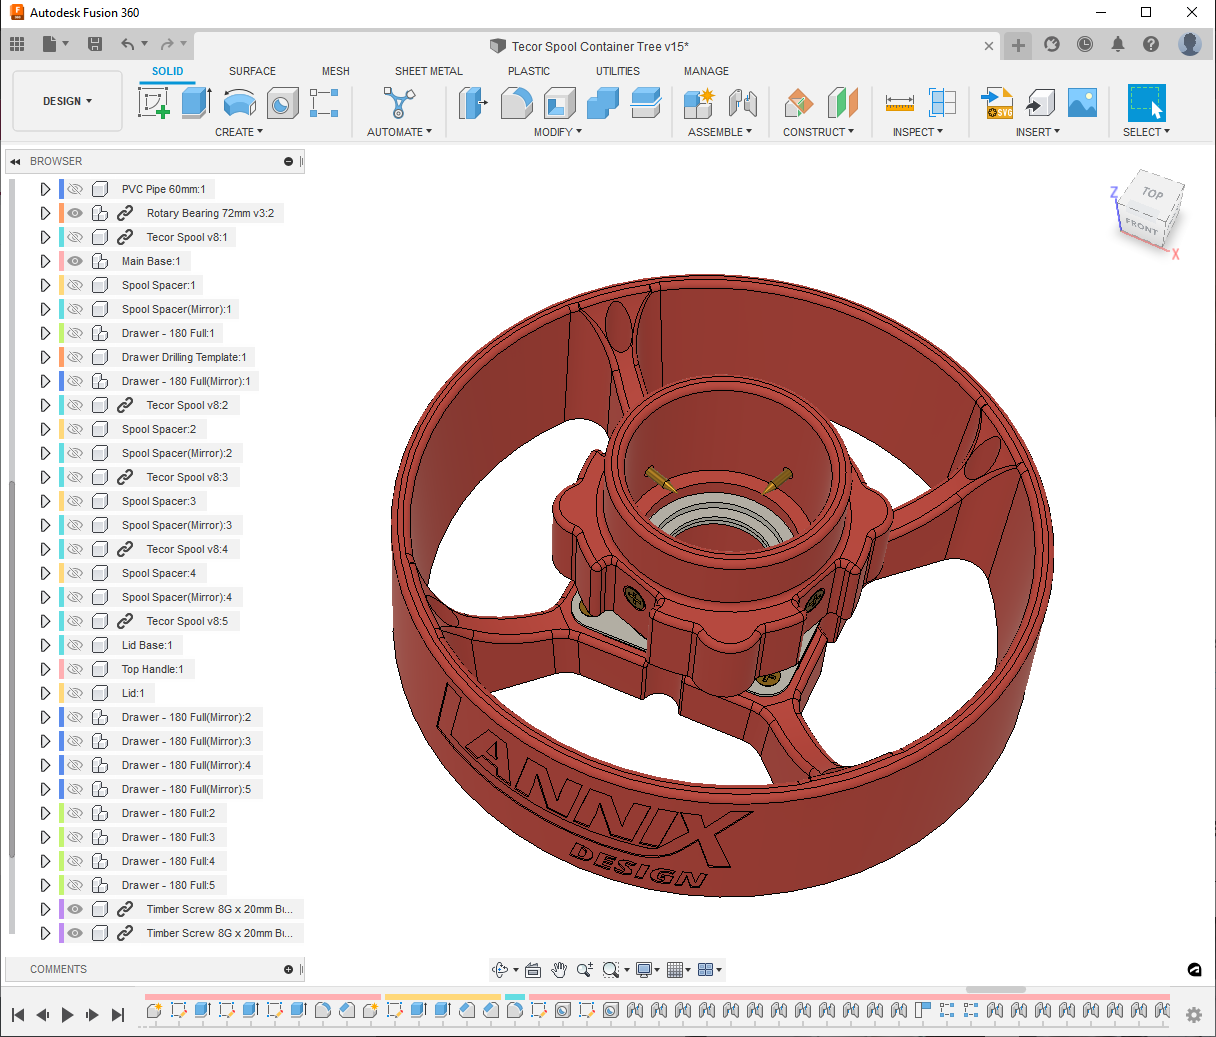
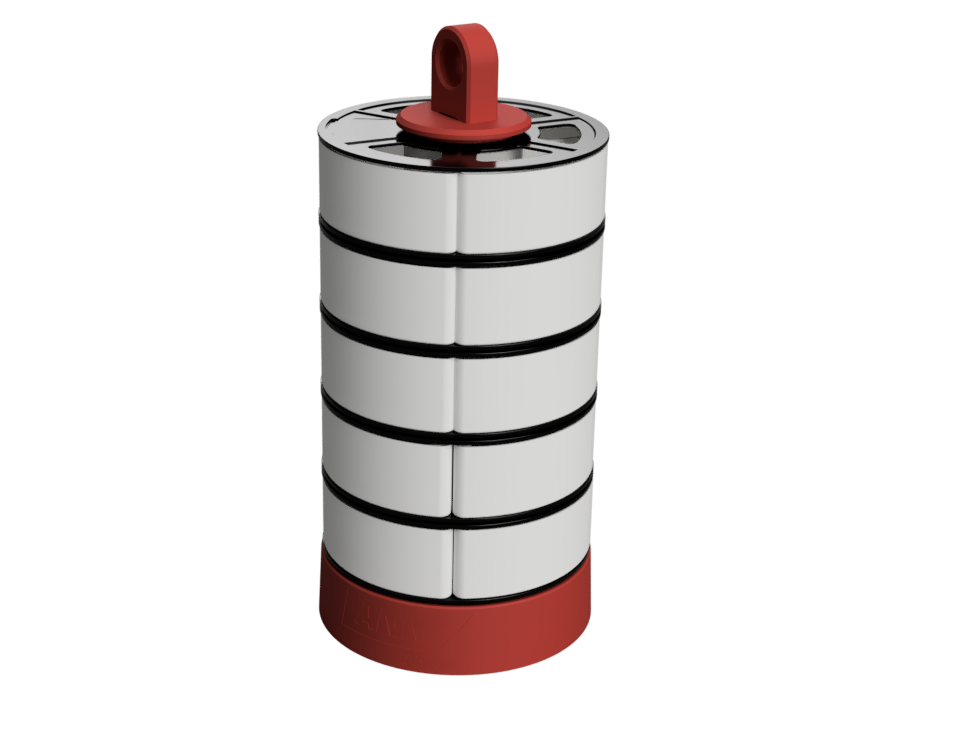
I need to be able to visualise my projects before I start to make anything so I have something to reference. All parts of the organiser were modelled in CAD before a tool was picked up so that the end result could be seen and any changes could be made.
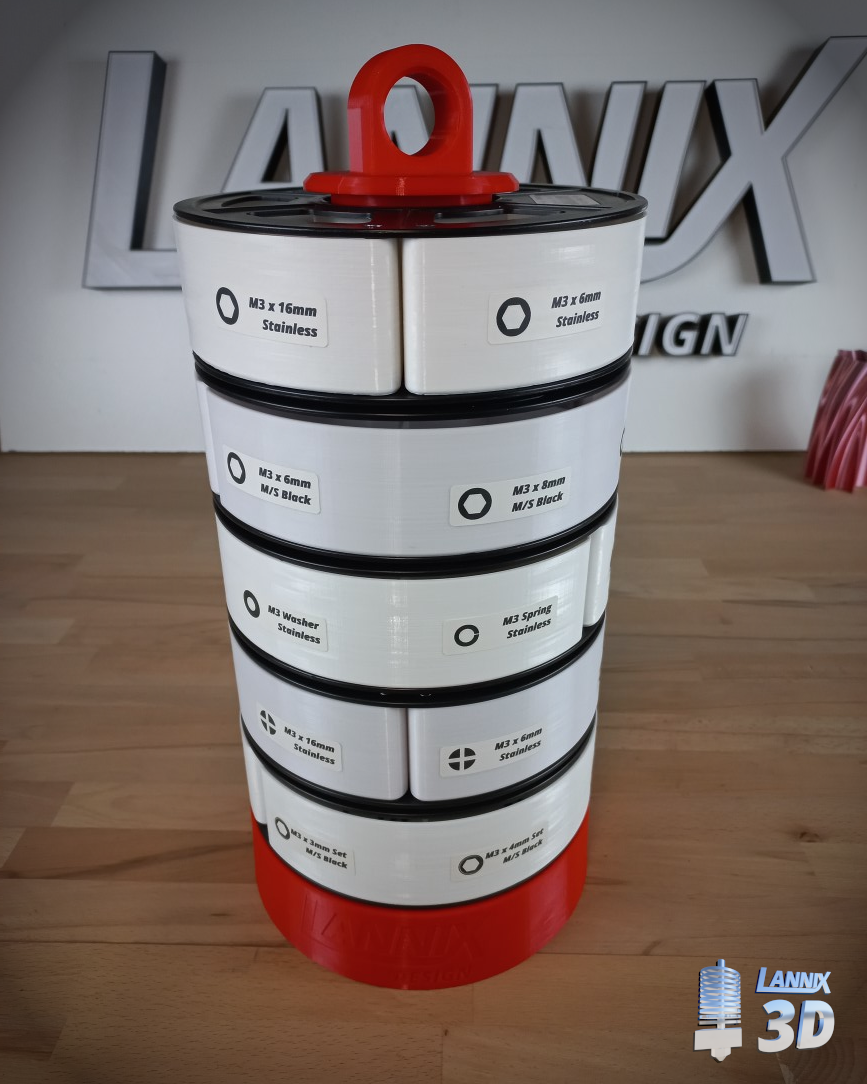
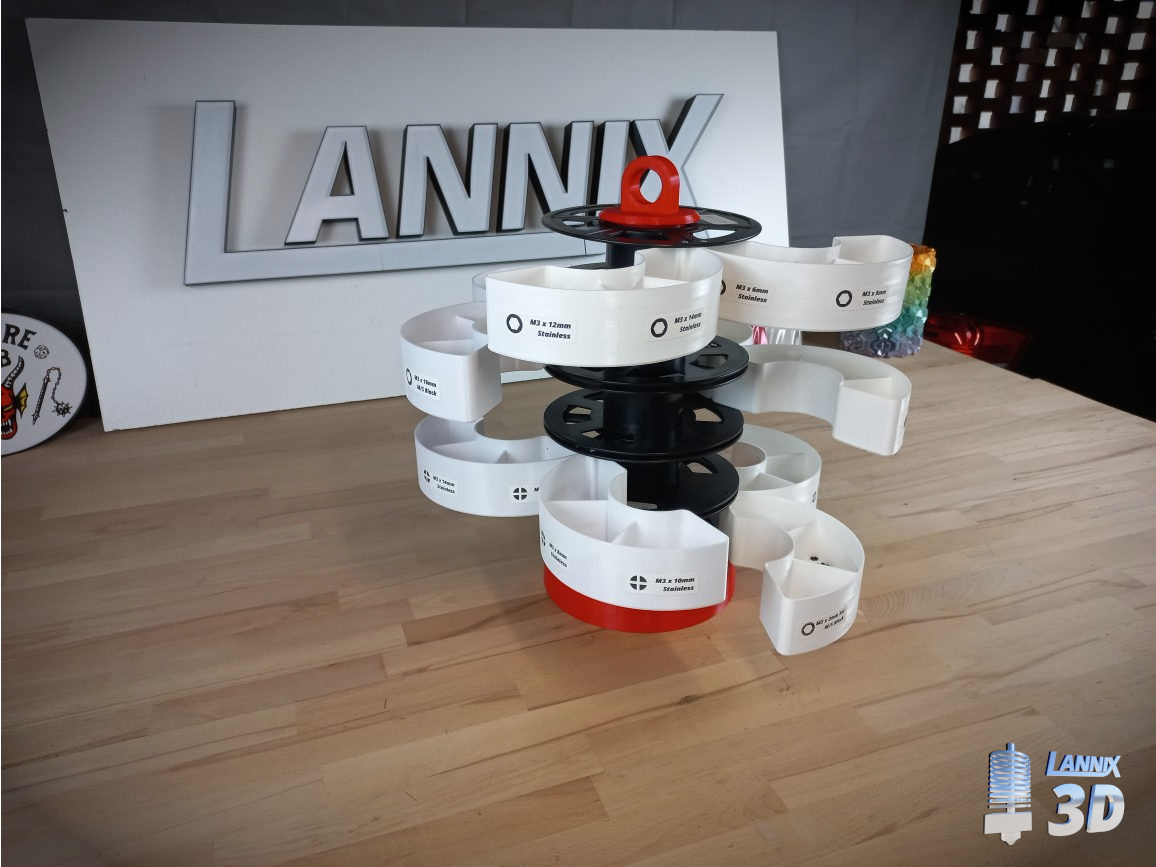
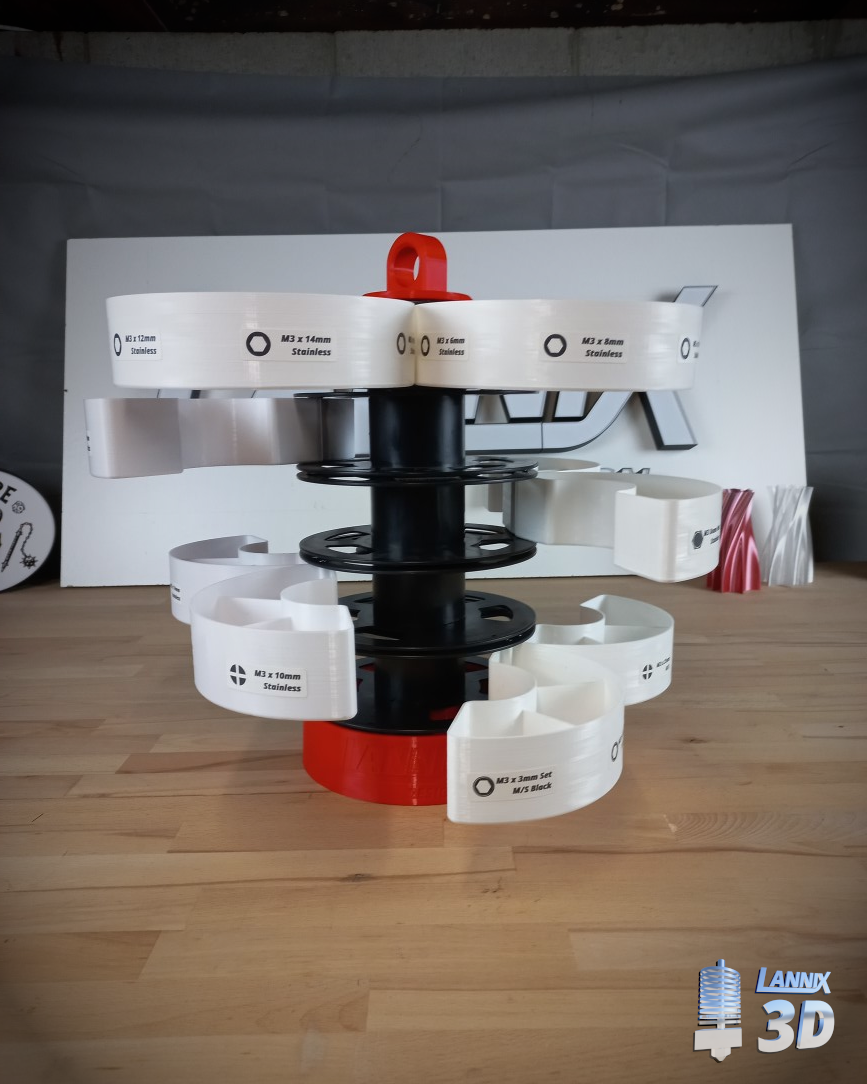
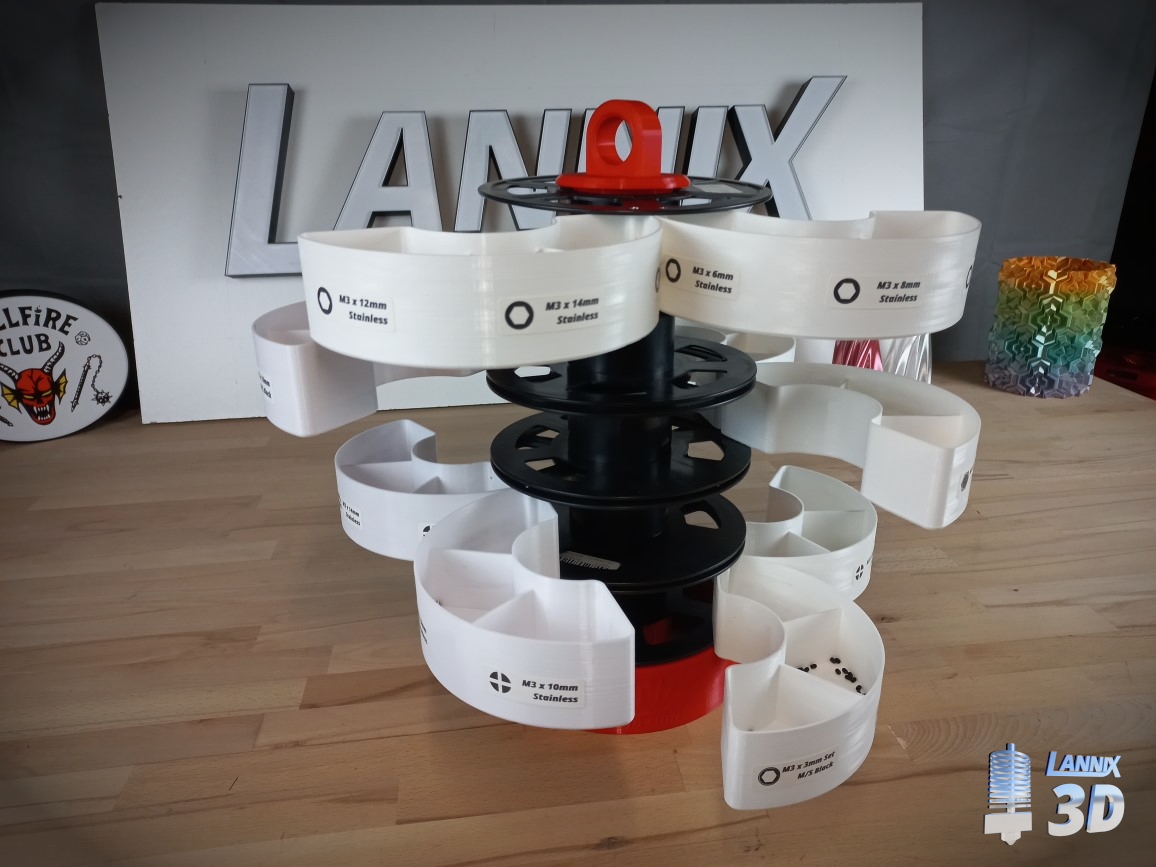
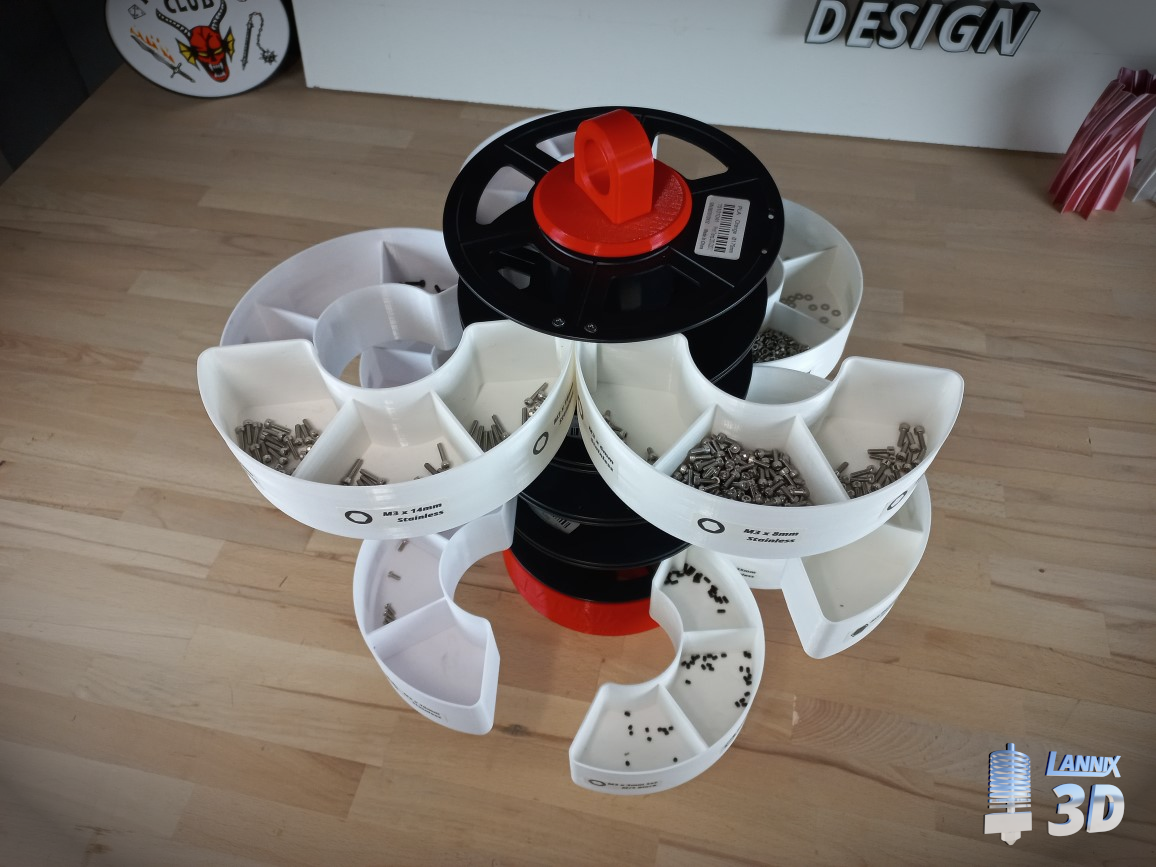
The finished assembly, now used to house many tiny screws.
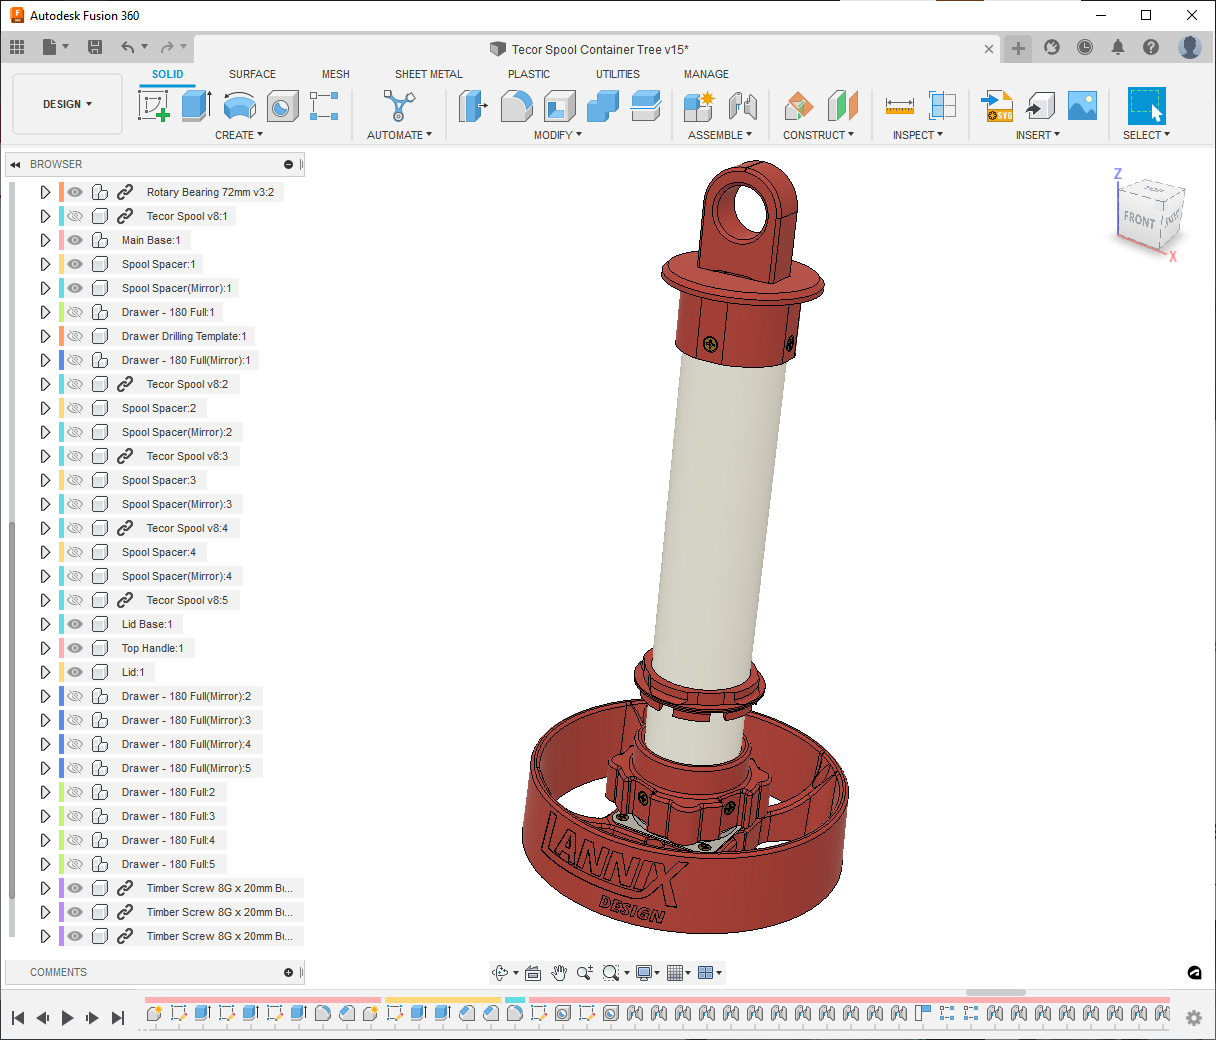
Since the major parts of the project were to be 3D printed, CAD modelling was completely necessary. One of the Tecor filament spools was measured with Vernier calipers for accuracy and 3D modelled which aided in creating parts that would fit around and inside it. I took the time to design a drilling template that would help to accurately install the parts containers when the time came which worked perfectly. I’m a big fan of these drilling templates and I’ve used them in all the projects I’ve done that require drilling.
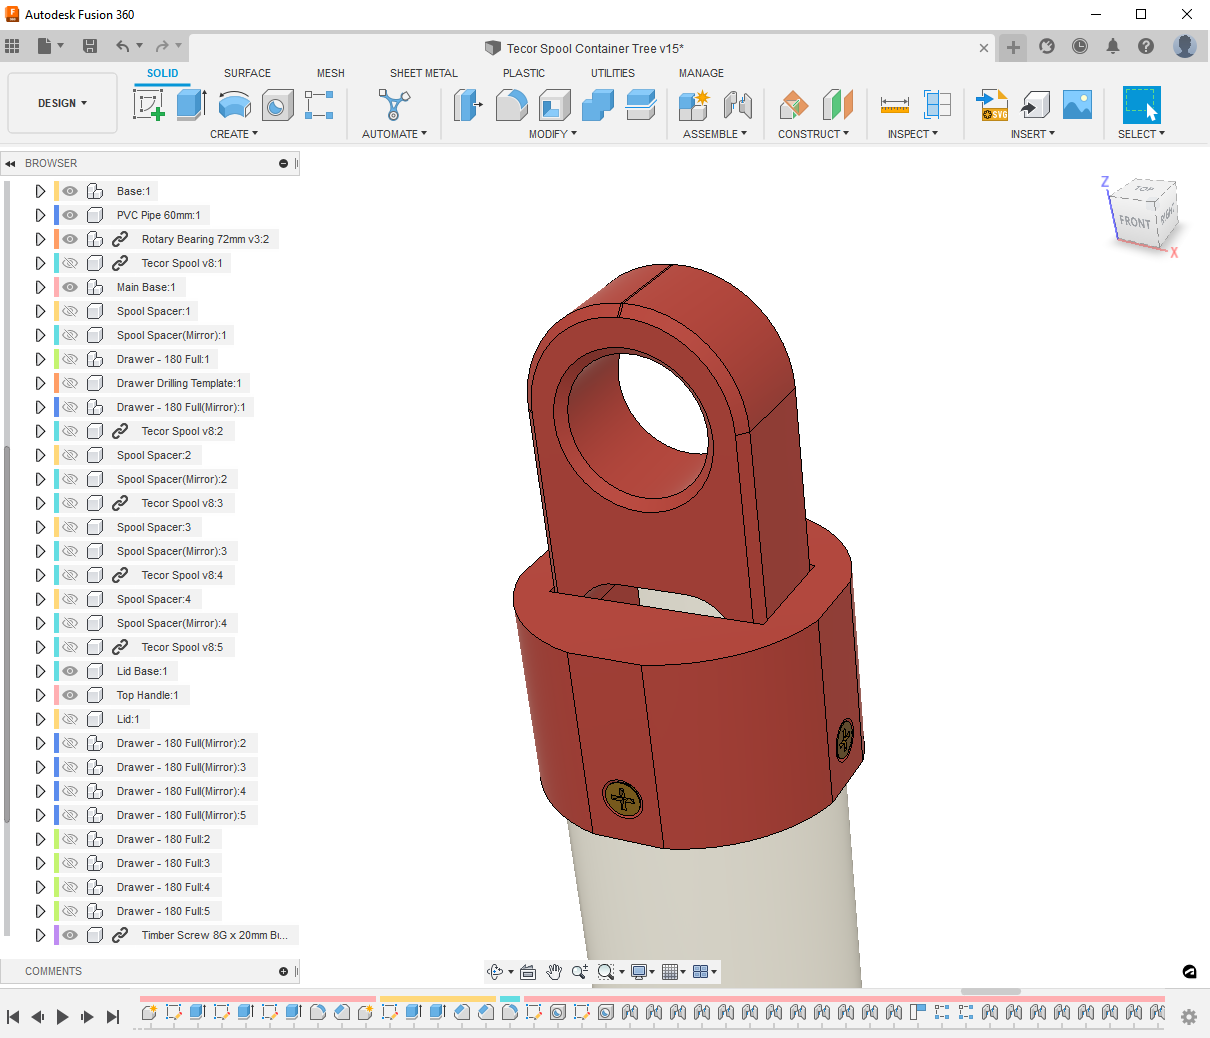
A carry handle was designed to be 3D printed in the orientation that would produce the strongest part. This necessitated a three-piece assembly that screws to the top of the PVC pipe and includes the top handle (ring), the handle support and a press-fit top cover.
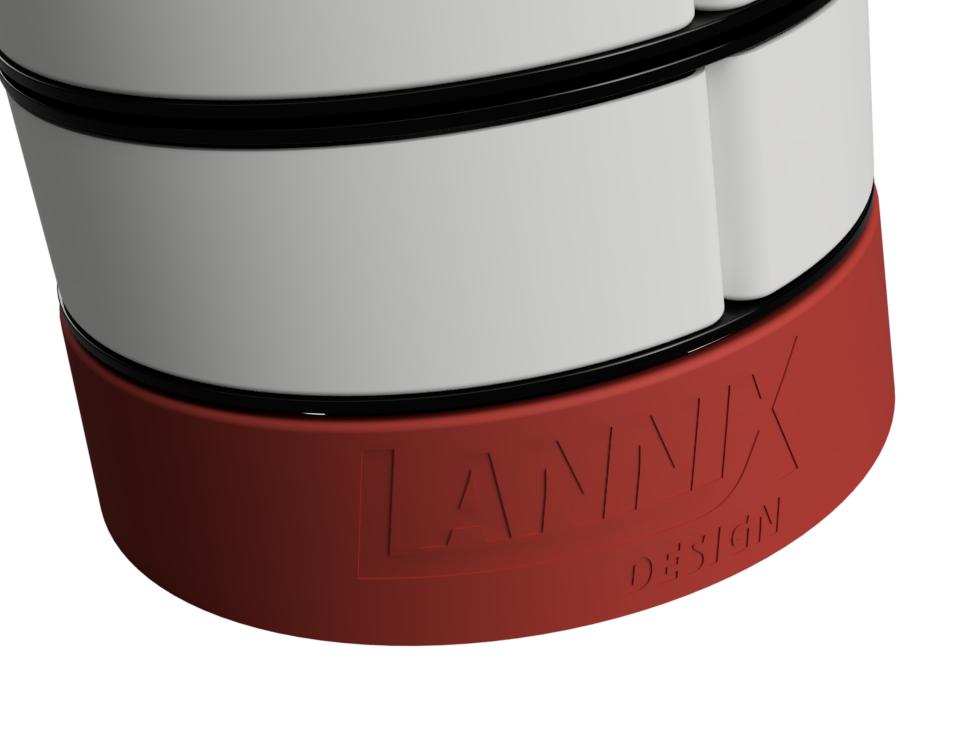
Gallery - Filament Spool Parts Organiser CAD Model
Building
The build was very straight-forward thanks to the time taken to model all parts and create the previously mentioned drilling templates. If you’d like to make one of these organisers for yourself I’ve outlined parts needed below and created a video guide for assembly that’s been uploaded to YouTube. The 3D models are available for download on Printables.com
Materials
The previously mentioned Tecor filament spools and the obvious 3D printing filament are needed to make the parts organiser. In addition to these, you’ll need a 72mm rotary (lazy Susan) bearing and a length of 60mm PVC pipe whose length will be determined by the number of spools you want to use.
Fasteners required are 8Gx20mm and 4Gx12mm timber screws. A small pack of each will be enough for the task.
The 3D models were printed with extra perimeters for strength and at a slower speed to give the best finish. Click the Printables logo below to download the models for 3D printing.
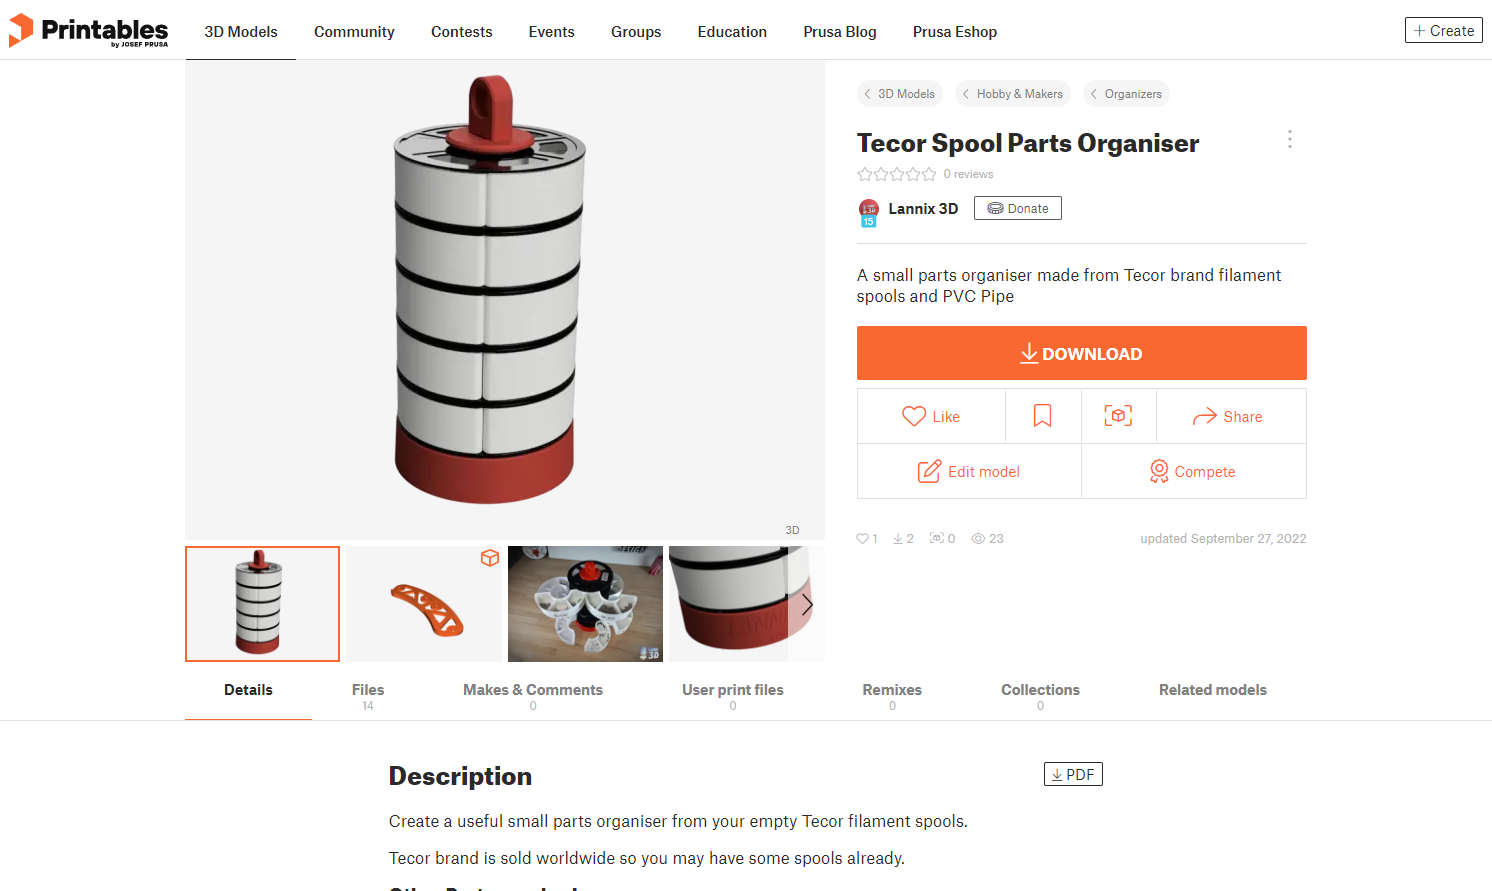
3D models are available for download on Printables.com.
Tools
Only basic tools are required including a drilling machine of some sort, a 3mm drill bit, a Philips screwdriver and something to cut your PVC pipe to length.
Assembly
The build process has been outlined in the linked YouTube video. It’s a very easy project if you’re interested in making one for yourself.
Take a look at the gallery below to see the finished product. It was assembled in one day once the parts had been 3D printed.
Gallery - Filament Spool Parts Organiser CAD Model
Conclusion
This project was designed to highlight the fact that it isn’t necessary to throw away your old filament spools to landfill. Although they are made of ABS plastic that can be recycled, reusing them is better than recycling in that no energy needs to be used to melt them down and mold them into something else. I’m hoping I can come up with more projects in the future that involve using parts that would otherwise be thrown away.
Until next week, ciao for now.